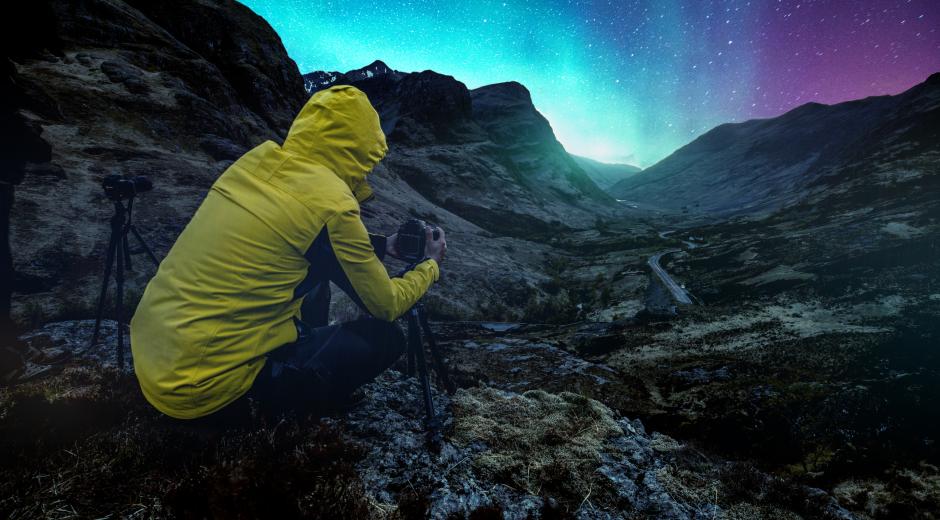
Photographing aurora borealis in the field
Guest post by Justin Nederkoorn,
travel photographer and videographer
Now that you know all the details about predicting and chasing aurora, it’s time to learn how to capture the phenomenon on camera. If you haven’t yet, read our article on how to predict and chase aurora so you know all about how to prepare for, chase and monitor aurora.
Gear
Capturing aurora is not only exciting, it’s also relatively easy to do with the right setup. I usually preach that gear doesn’t matter but when it comes to shooting at night, there are a few factors you’ll want to keep in mind when packing your bag.
And to ease your concerns about the camera body: it's not the most crucial tool in your arsenal.

Lenses
To limit digital noise we want as much light as possible hitting our camera’s sensor, and we can win a lot of territories here by choosing the right lens. While many people find the versatility of an f/2.8 zoom lens attractive, there will be a noticeable difference in quality as you’ll have to bump up your ISO to make up for the loss of light. If you have the option, I’d highly recommend bringing primes. An f/1.8 lens is good, but having an f/1.4 or f/1.2 is best. Not only does this gain you an extra stop in light, their glass is generally of better quality.
Your focal length depends on your artistic choice, but aurora can be quite a large spectacle. Therefore it’s a good idea to pack a wide-angle lens such as a 24mm or even wider at 20mm or 14mm. This helps you to frame both the aurora and the landscape in a single shot.
Accessories
A tripod is an absolute necessity when it comes to photographing aurora. I recommend investing in a tripod that’s easy to operate so you can move quickly. Remember, aurora is often moving fast, growing or fading by the minute. So you don’t want to lose any precious time fiddling with your equipment.

Often overlooked is the L-bracket. Again with speed in mind, an L-bracket allows you to quickly switch from vertical to horizontal framing. I’ve had countless times when I was shooting a horizontal composition when suddenly the lights started to go crazy well above my frame. Being able to switch to a vertical composition in just a matter of seconds has saved my shot in many cases. It’s an affordable piece of equipment that’s just great to have, also for daytime photography.

Gaffer tape is indispensable at nighttime to cover up any annoying lights on your camera. Make it a custom to always have a small roll on you so you don’t accidentally mess up other people’s shots.
Camera
Technically speaking, just about anybody will be able to capture the aurora if handled properly. Having said that, there are a couple of functionalities that you’ll want to consider when picking a body.
First of all, there’s the photography antagonist ISO. As you know, the higher the ISO, the more your exposure will increase. However, the payoff is that you’ll start to introduce noise and decrease your dynamic range. Therefore it will definitely help to pick a camera that allows you to increase your ISO to at least 1250 without introducing disturbing noise. For me, this meant going with Sony since they have astounding low-light capabilities, and the A7IV is the perfect fit for this kind of work. Having a low pixel count helps to keep the noise to a minimum, so definitely think twice before bringing your monster 51MP camera.
There are also some features that will help you to capture the aurora more easily. Some cameras have a built-in delayed shooting functionality, allowing you to set a timer. This will help you to prevent ruining the photo because of vibrations caused by handling the camera. Another useful feature is Bright Monitoring. When using manual focus, this allows you to see at a highly increased brightness, making it easier to spot the interesting parts of aurora.
Camera Settings
As I said earlier, capturing aurora is relatively easy, and everyone with a fairly decent camera can pick up the lights and show them to family and friends at home. However, getting amazing shots of this spectacle requires some further understanding of your camera settings.
Shutter speed
The longer our shutter speed, the more light we can get in, and the lower we can keep our ISO. So we go with a 30-second shutter speed to get as much light as possible. Simple, right? Beware though, this is a mistake often made by first-time aurora photographers.
 30s, f/4.0, 16mm. There’s a time and place for long exposures. Being limited by my f/4 wide angle, I used 30s which worked in this case since the aurora was barely moving.
With high-level aurora activity, the lights can dance through the sky very quickly. So when you take a photo at a 30-second exposure, instead of seeing the instantaneous scene that your eyes can see, your camera will actually pick up the entire movement of the lights over that 30-second timeframe. Resembling the effect that you get when creating a long exposure with water, all of the color and movement get mixed together, resulting in a blob of color. That’s not what we want, we want vivid colors, accentuated streaks, and clearly defined patterns.
Usually, this means setting your shutter speed anywhere between 3 and 10 seconds. If the aurora is really faint and not clearly defined, you can try going above 10 seconds. However, I’m always focussing on the shorter end, shooting under 5 seconds and more towards 2 to 3 seconds. This allows me to get well-defined aurora, which I much prefer over blobs of colors. If the aurora is too faint, I’d rather check the activity to see if it gets better and wait it out.
Aperture settings
This is an area where you can really win stops of light if you’ve invested in a good lens. I’m usually shooting with my 24mm f/1.4 which allows me to gather way more light compared to an f/2.8 lens. Depending on the quality of your lens, I do recommend stopping it down a little to increase sharpness, decrease vignetting and coma, and make focussing a bit easier. When you’re experienced with the lens’ capabilities and manual focussing at night, you can start pushing it to its limits. For me, this usually means shooting at f/1.8. When there’s really high-level activity, I sometimes open all the way to f/1.4 in order to keep my shutter speed under 2 seconds.
ISO
You select a shutter speed not to determine exposure, but to determine the definition of the aurora. You set your aperture to the maximum it allows without compromising on quality too much. What’s left to control your exposure is the ISO.
This means that you select your ISO to whatever value gives you the right exposure, which we’ll get into later in this article. My ISO value often ends up at around 800 to 1600. But you’ll have to experiment to discover what works best for your camera, and having a good understanding of how to expose aurora correctly will make choosing the right ISO an easy task.
White balance
The general rule of thumb is that at night the color temperature is usually in the range of 3,200K - 4,800K. I personally like my shots to be a little cooler and gravitate towards 3,200 Kelvin. Don’t worry too much though, you can always adjust the temperature in post-processing, but it’s better to get it in the ballpark straight from the camera. Go with a value that feels right to you and that fits your creative look.
 4800K vs 3200K straight from the camera
Delayed shooting
As I mentioned before, always put your camera into delayed shooting to prevent any shake or vibration from messing up your shot. I always go with a 2-second delay, since a 5-second delay makes it more likely to miss my window.

Focussing at night
Perhaps the most important technical part of shooting at night is to nail your focus. And it’s also one of the hardest parts to get right. Many shots of mine were ruined from being slightly out of focus, especially at the beginning of shooting at night. So let’s see how to prevent that from happening.
It’s important to learn the appropriate focusing distance for the lens you’ll be shooting with. Some mirrorless cameras such as the Sony A7IV will display the distance in meters. If that’s the case for you as well, then I suggest focusing on something manually at the horizon during the daytime and writing down the distance. Keep in mind that you use the same aperture as you would use during nighttime. If in doubt, go wide open. If you’re sharp wide open, you’ll be sharp when stopped down.
This technique of focusing during the daytime will help you prepare. But you can also revert back to manual focusing at night, and learning this skill will be extremely helpful to keep you flexible. Take a look at the sky, aim at the brightest star you can see, and magnify your liveview as much as possible. Then start rotating your focus ring back and forth so you can see the star growing and diminishing. Try and nail the point where the star is as small as possible. This will take some time getting used to, but it’s the most reliable way to focus at night.
Whichever method you choose, make sure to experiment with it. You can do this from your backyard. Don’t mind light pollution or composition, just try and nail the focus as best as you can. Then import your photos on your computer and start pixel peeping. Keep doing this until you feel absolutely confident. You don’t want to lose precious time fiddling around with your focus while the aurora is dancing the night away. Nor do you want to end up importing your aurora shots and finding out that they are all slightly out of focus.
Learning to expose
Achieving the right exposure for aurora is important, but tough. You can’t rely on the tools usually available to measure exposure. Even slightly blown-out highlights will result in weird banding effects, often hard to restore in post-processing.
Metering
The metering mode usually gives you a fine indication of your exposure. At night, however, this is completely useless. Never pay attention to the metering as it might throw you off guard.
Histogram
The histogram is a wonderful tool to measure exposure and I recommend every photographer to use it for daytime photography. However, it also can be misleading when shooting aurora.
Your standard histogram visualizes the luminosity of your shot. Luminosity pays attention to light, not color. Therefore you can interpret the values of this type of histogram as an average of red, green and blue. However, you can see the problem. Our aurora shot isn’t made up of red, green and blue. It’s primarily made up of green. Therefore the average luminosity may seem fine, but the actual green channel could be blown out.
In order to expose correctly, It’s important to fully understand this. Let’s take a quick example. We’re looking at the brightest pixel in an aurora photo. The luminosity value of this pixel is 200. Since our pixels don’t blow out until 255, this is perfect. However, when we separate the luminosity channel in red, green and blue, the values are as follows. Red is 20, green is 255, and blue is 170. The green channel is fully blown out, yet our luminosity channel says we’re fine.
This is why we don’t measure our exposure with a luminosity histogram but with separate red, green, and blue histograms. Almost every camera is able to offer these histograms when looking at your photo, and you have to pay close attention to your green channel to make sure you’re not blowing out the aurora. If you’re in doubt, always underexpose slightly so you can see the tail of the green histogram ending before the 255 mark.
To illustrate this further, let’s take a look at an overexposed shot vs a correctly exposed shot taken from my last trip to Iceland.

Overexposed. As you can see on the green histogram, the tail is touching the far right, indicating that the green highlights are blowing out. You can see a banding effect happening at the brightest area.

Correctly exposed. As you can see, the tail doesn’t touch the far right, although it is arguably too close. I would suggest lowering the exposure to prevent the aurora from blowing out while shooting.
Creating a composition
Shooting aurora may seem very technical, but fear not. These are just some techniques you need to understand and master so these become second nature, allowing you to really focus on the creative side of shooting aurora. The most important being composition. But before we look at composition, we first need to determine if we’re shooting only the sky, or if we’re shooting the sky and foreground simultaneously.
Shooting the sky
Chasing aurora is tough, and you don’t often get to pick locations. So it’s not rare to end up in the middle of nowhere to capture this phenomenon. During my last trip to Iceland just weeks ago, I was actually surprised by aurora when I least expected it. So, it’s important to be flexible. Instead of rushing to a location that offers a foreground, and perhaps missing your window, consider shooting just the sky. This will allow you to build a library of aurora shots that you will be able to use later on.
Before you grab your camera and start shooting in every direction though, pause for a moment. Take a good look at where it’s at its strongest, where you see the most movement, and where the patterns are best defined. With moderate and higher intensities you can often see streaks and lines appearing, which can serve as perfect leading lines for compositions. Make sure to capture these patterns first as they likely won’t stay vibrant for that long. aurora is a quickly changing spectacle and it’s not forgiving. If you miss your window, it’s gone. Having a wide library of streaks and patterns will give you more flexibility when choosing the best aurora for a certain shot.
Combining sky and foreground on location
If you've done your research and arrived at your chosen location in advance, you'll be well-prepared to capture the mesmerizing aurora as it unfolds before you. It's highly recommended to scout the location during daylight hours to gain a solid understanding of the compositions you'd like to create. Don't limit yourself to a single preconceived composition; instead, explore various angles and possibilities, ensuring you're adaptable to the ever-changing aurora dance.
Avoid fixating on predetermined compositions. If you witness a captivating element that could enhance your shot, seize the moment and adjust your composition accordingly. Keep in mind that time is of the essence during these transient events, often lasting mere seconds to minutes. Therefore, a deep understanding of the techniques involved in capturing the aurora, combined with instinctive mastery, allows you to concentrate on the creative aspect – framing the lights in the most compelling way.
The key to shooting aurora on location and for it to be as realistic as possible is to shoot the foreground shortly after. Focus on capturing the lights first and when they start turning dim, shoot a long exposure without changing your composition. The goal here is to capture the foreground with as much detail and as little noise as possible. Open up your shutter speed to 30 seconds (or more if you have an intervalometer) and drop your ISO until you have the right exposure. To ensure you can properly combine both the sky and foreground exposures during post-processing, I recommend not changing the focus distance.
If you want your foreground to be in focus as much as possible, there are two ways to approach this. When utilizing an intervalometer for extended exposures, you can opt for a wider aperture to enhance the depth of field. Alternatively, you can also use a technique called focus stacking to increase the depth of field. This can be hard when you’re shooting at a low aperture, so I advise to pick at least f/2.8 for better results and less risk.

Editing
Of course, the joy of shooting aurora doesn’t stop here. Once you’re back home with your collection of shots, we can start extracting the magic! Whether you shot the sky by itself, want to combine the foreground and sky, or even want to composite a blue hour shot with an aurora edit, there are a lot of techniques to explore. In the next article, I’ll go over everything you need to know to go from a RAW photo to something you’d hang on your wall.